Photo Management - Culling and Filtering
My Management Workflow in Lightroom
While individual “grab shots” still have a part to play in my photography, my workflow is increasingly based around batches of related images—whether from a single event, a planned photo outing, a studio session, or a week’s shooting leading up to my emails or blog posts.
This means I am regularly dealing with sets of 40–50 images, and for larger events, sometimes several hundred.
So how do I manage this volume? How do I identify which images to edit, which are the real “keepers,” and how do I build a meaningful record of my best work over time?
Over the years, I have developed a simple but effective grading system that I apply to every photograph as it moves through my workflow. I use Adobe Lightroom, but the same principles can easily be adapted for Google Photos, Apple Photos, or other photo management tools.
Step 1 – Import and Organise
Immediately after a shoot, I remove the memory card and transfer the images to my main photo storage drive. This ensures they are quickly brought into my backup system, where they are automatically duplicated to a second local drive.
At this stage, I also create a collection (a virtual folder or album) for the shoot. This makes it easy to isolate and manage images from a specific session—particularly useful when multiple shoots overlap. This also copies the photos to the Adobe Cloud, the 2nd aspect of my back up system.
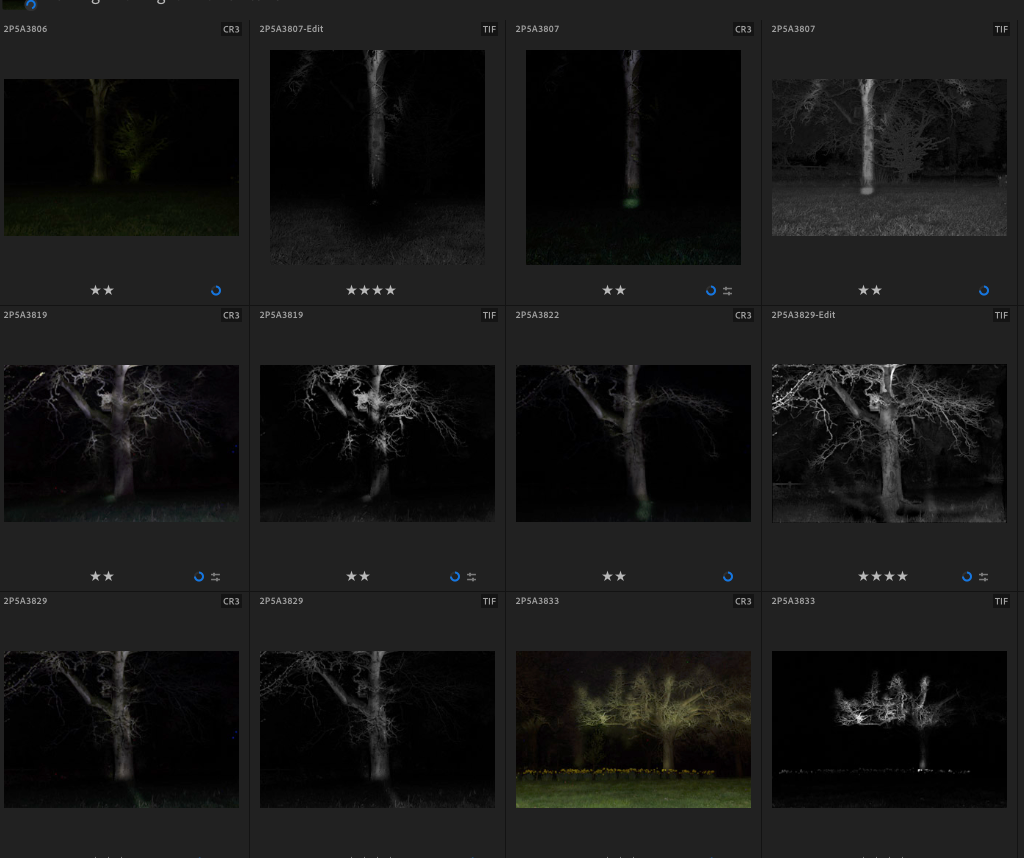
Step 2 – First Pass (Culling)
The first pass is all about speed and decisiveness.
I review every image at a large size and apply a simple initial rating:
- X (Reject) – Images that are clearly unusable (out of focus, badly exposed, or taken in error)
- ★ (1 star) – Images with potential; worth taking forward
- No rating – Images that are not progressing (duplicates or technically weak shots)
At the end of this pass, I filter the collection to show only the 1-star images—the ones that will move into the editing stage.
Step 3 – Basic Editing
I then carry out initial edits on the selected images—exposure, contrast, cropping, and basic adjustments.
Once edited, each image is upgraded to:
- ★★ (2 stars) – Edited, but not yet fully evaluated
Step 4 – Final Selection and Grading
This is the most important stage.
I review the edited images in relation to each other, refining adjustments and making creative decisions. This is often where I experiment with black and white conversions and apply keywords such as “BW”.
At this stage, I assign final ratings:
- ★★ (2 stars) – Edited, but not progressing further
- ★★★ (3 stars) – “Club level” images; strong enough to share and be proud of. Anything less than 3 stars are then archived from Adobe Cloud to save on Cloud Storage.
- ★★★★ (4 stars) – Project or panel standard; suitable for submissions or structured work
- ★★★★★ (5 stars) – Portfolio images; the standout shots (perhaps 20 or so per year)
Why This Matters
- Efficiency – Avoid wasting time editing weak images
- Clarity – Apply a consistent standard to your work
- Progression – Build a strong portfolio over time
It also reinforces an important discipline: not every photo deserves to be kept—and that’s a good thing.
A Final Thought
Culling can feel ruthless, but it is one of the most important skills in photography.
Taking photographs is only half the process—choosing your best work is what defines your style and raises your standard.